Getting Started
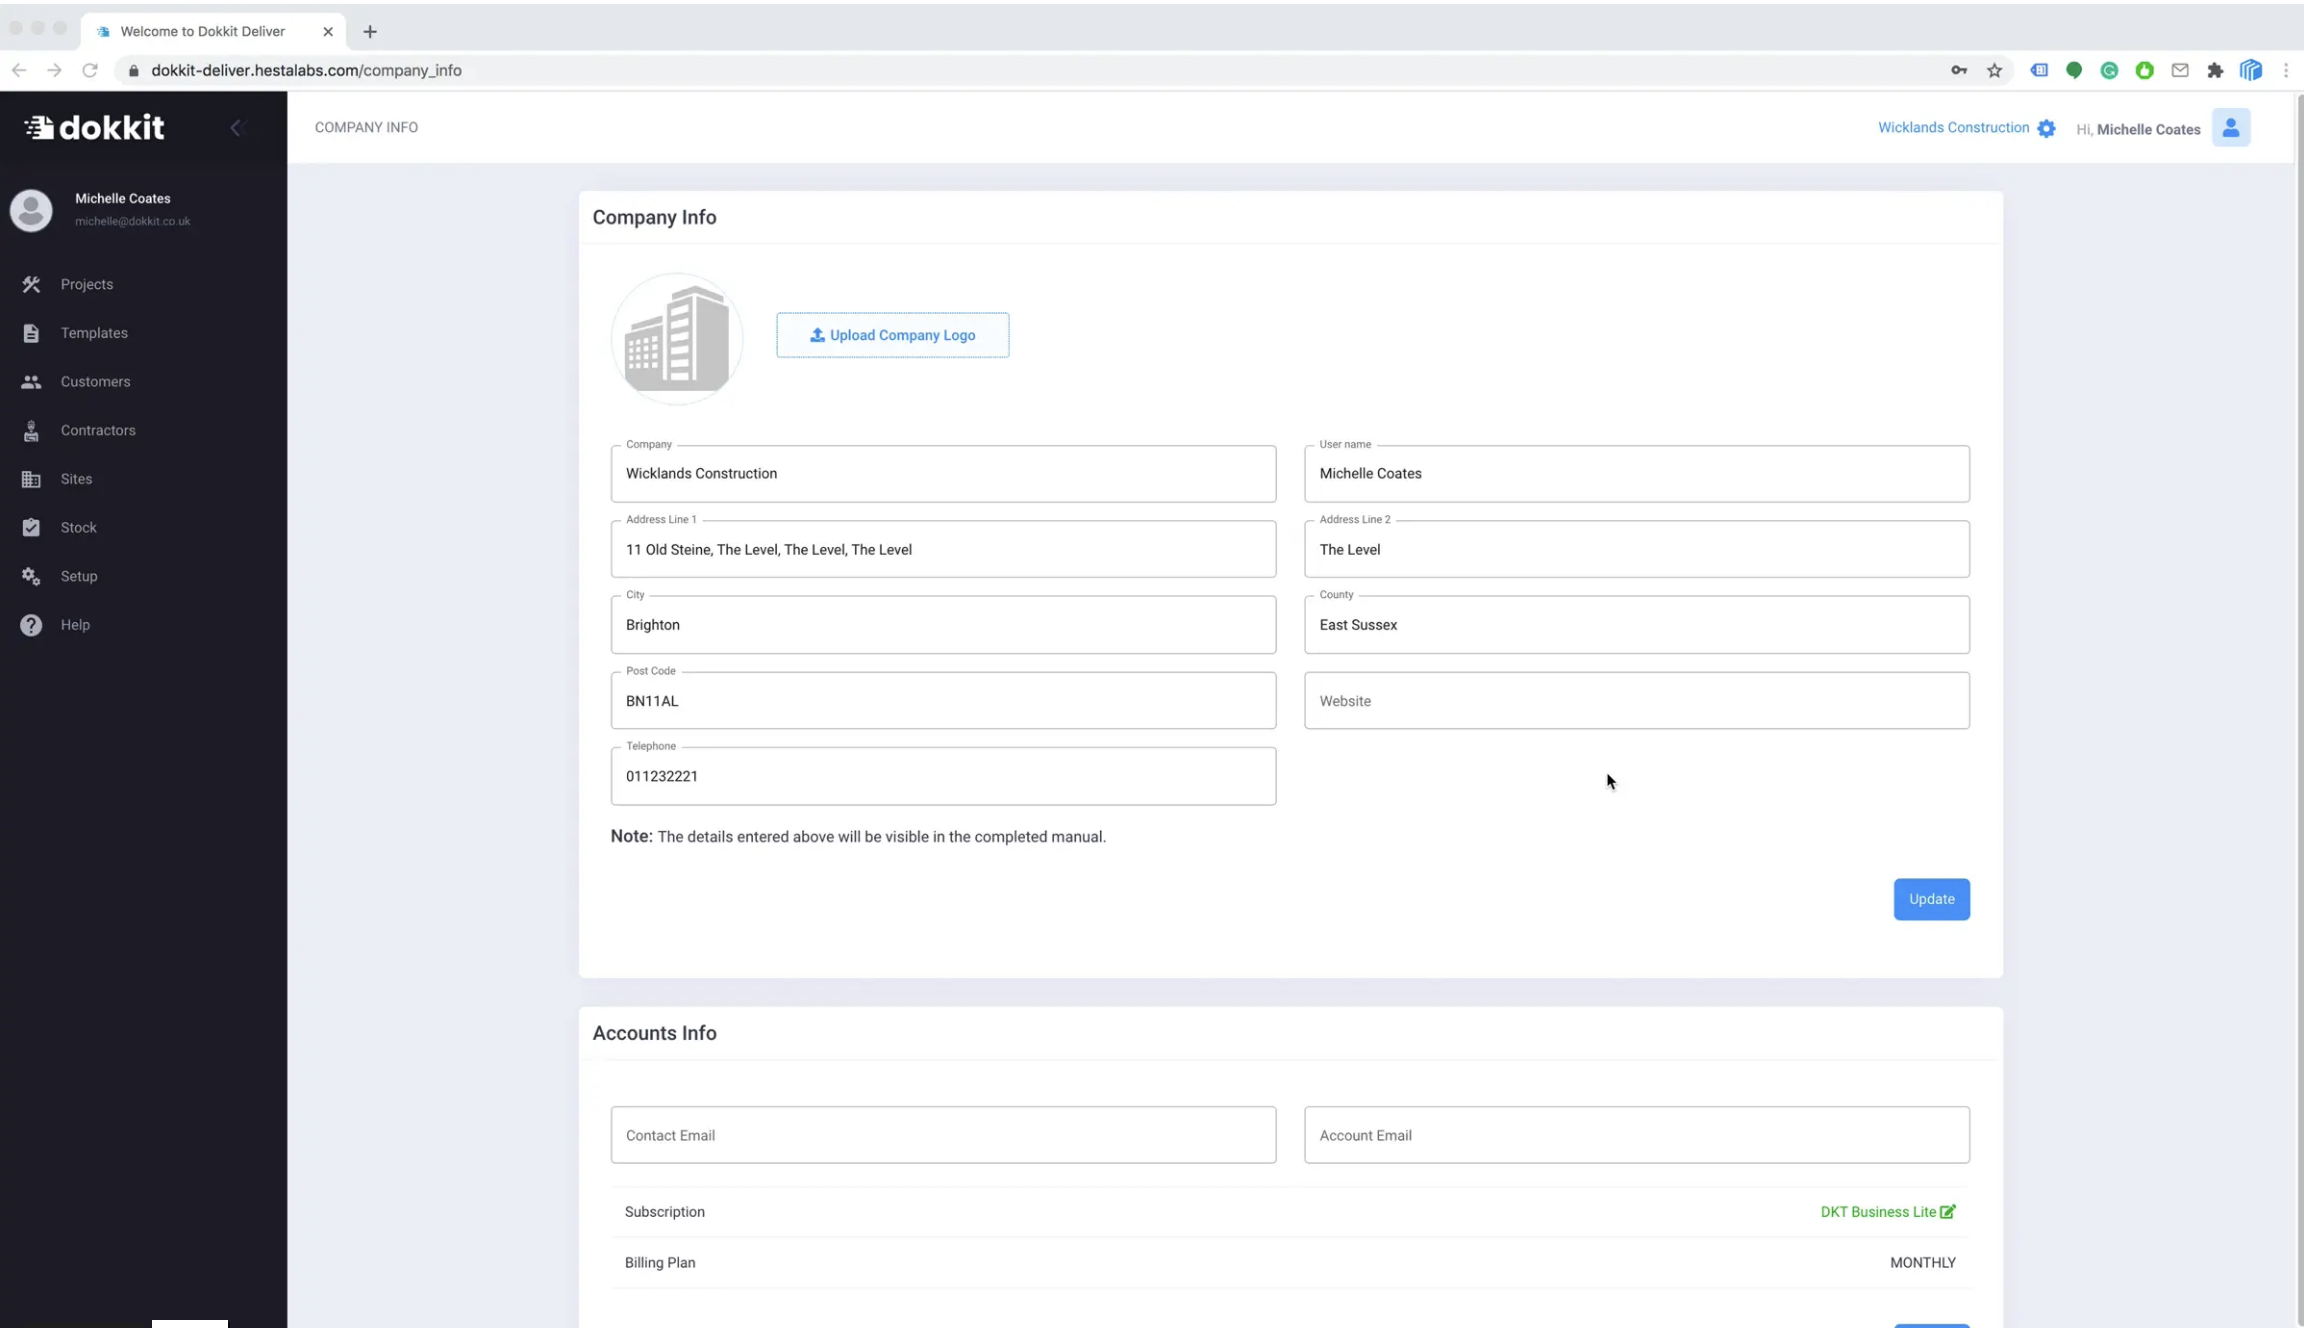
When you first login you’ll be on the Company Detail page, you’ll need to fill in those details before you go any further as those values will be used in your template. You can edit and update those at any time.
Once you’ve updated those values you’ll be able to click through the navigation pane on the left hand side and create your first project.
Projects
When entering your first project you won’t have any customer or site information so you’ll need to create them by clicking on the ‘+’ button to the right of the customer dropdown box.

You’ll need to do the same for the site information. Note: you can upload customer and site information in the Setup area.
Once you’ve entered those details select your manual so that you can start adding job specific information in the Works Type area.

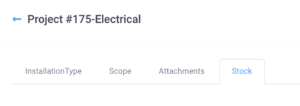
Now you can select a work type from the dropdown menu and start entering your scope of works, attachments and stock.

Click the word (in this case Electrical) and you’ll be taken to the entry pages.
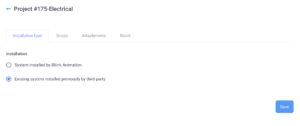
The Installation Type is a toggle group you can only choose one option.
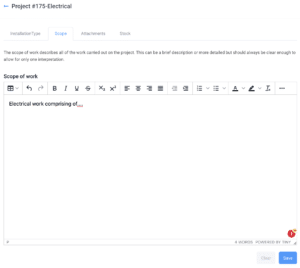
The next tab is the Scope tab this is where you will add the specific information relating to that work type. You can start typing directly in the box or copy and paste using CTRL-V or Command-V and then add colours, tables etc.
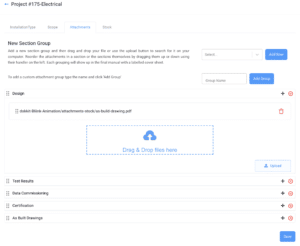
In the Attachments tab you start by choosing an attachment type from the drop down box or add a custom specific group name. Each attachment group will have a cover page with it’s name and be automatically indexed from the table of contents. Once you’ve added a group either drag and drop or upload from your computer any files you need. You can reorder the files or the attachment groups by using the dotted handler on the left, just position your mouse over it and drag it up or down.
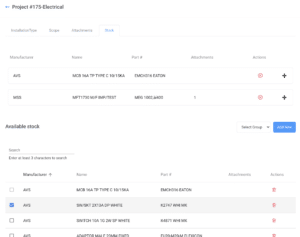
Lastly, you add any stock items to the project either from an existing list by clicking the box on the left of the name and clicking the green button ‘Add To Project’ at the bottom of the page or by creating a new stock item using the blue ‘Add New’ button.
When you’re happy with all the elements you’ve added you can click back to the main project page using the blue back link at the top of the page
If you’re happy with everything you can now create your manual. To view the manual you can either download it from within the project or go back to the list of all projects and you’ll see some options to the right of that project to view, download or email.
Setup
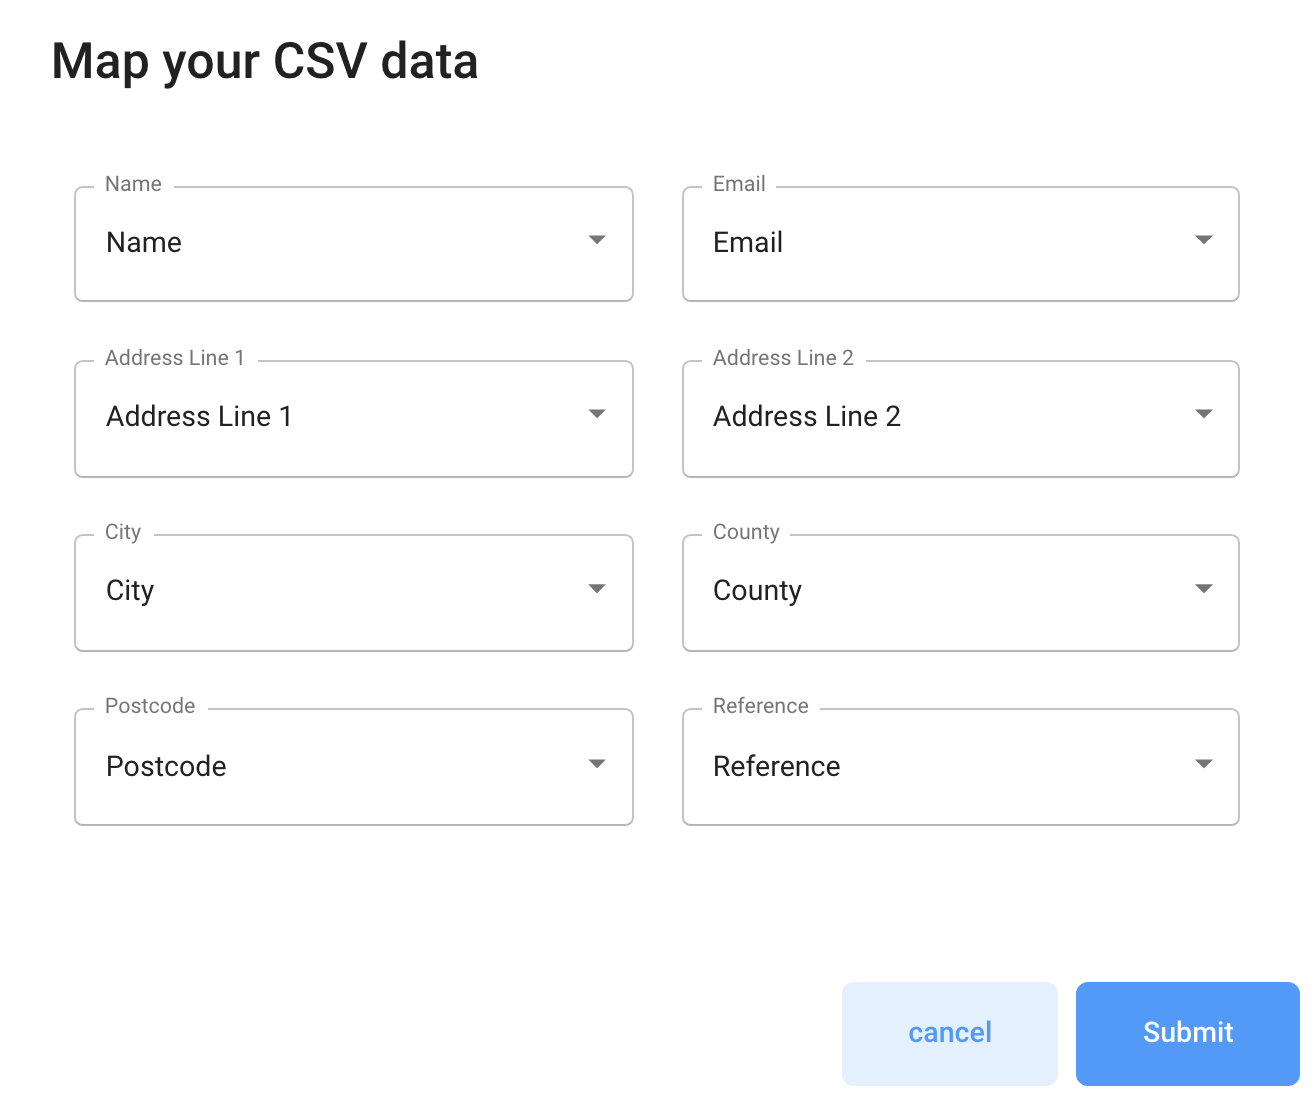
Navigate to the setup page and select the table you would like to import data into. when you select a type from the Import Data dropdown the system will display the values you’ll need to import.
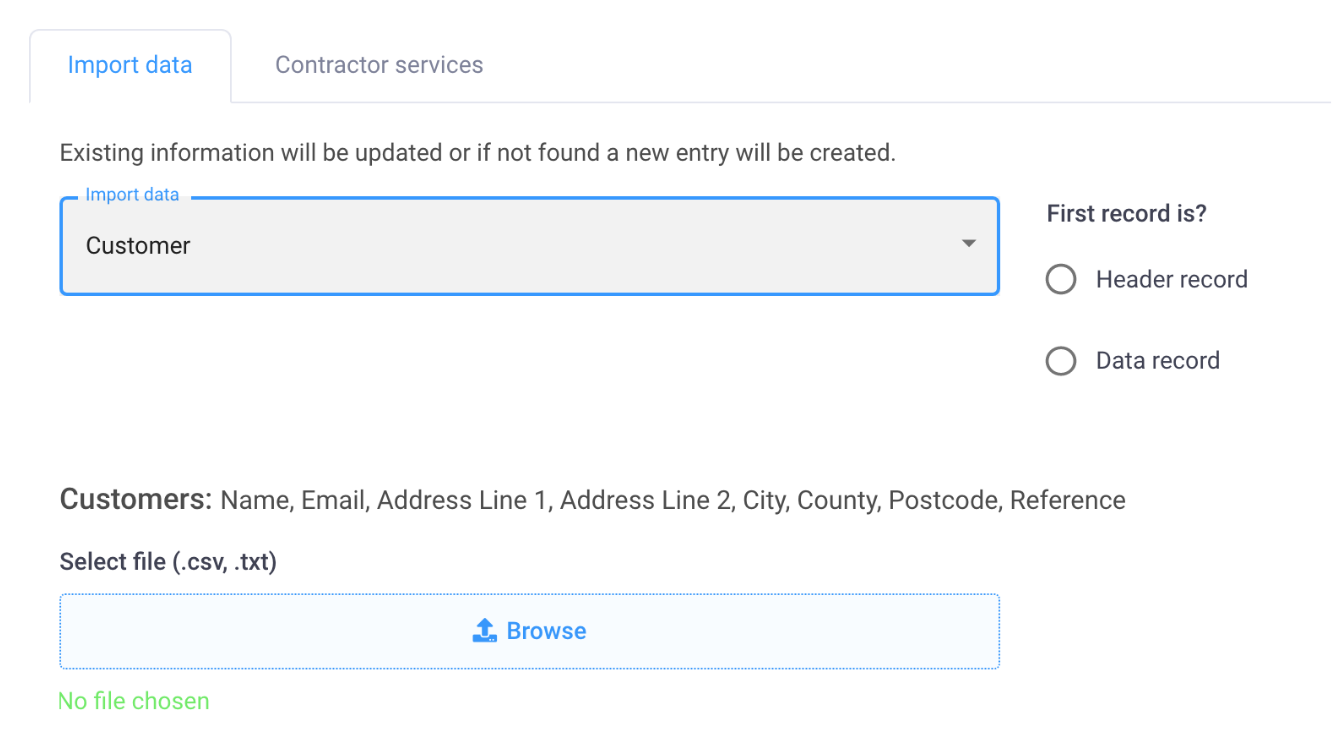
Browse for you file and then map your values to the ones stored in Dokkit.
Contractor Services
In the setup page choose the Contractor Services tab and enter new types. If you are importing contractors any types not found will be automatically added. Typical types are; roofing, flooring, electrical, security etc.

New Users
To add a new user you need to go to the setup ‘gear’ icon next to your company name on the top right of the screen when in the app and select users.

You’ll then see your current users in the table. Select ‘Add New’ and you’ll get the following popup screen:
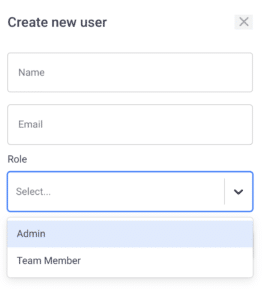
Enter the users name and email address. For the role you can choose between Admin and Team Member. The only difference between the two roles is that the Admin user can access the company page and subscription information. Once you’ve entered all of the information hit ‘Save’ and an invitation will be sent to that users email address giving them access. If they don’t see the email in their inbox have them check their spam folder.
The title cover sheet contains some dynamic information such as the Client Name, Site Address and the Project Collection Date and some static information such as your logo, web address and registration number. As long as this document contains the necessary curly brackets codes the system will be able to process the information.
Contact us if you need help designing your template. Be careful not to update or delete the entries in the table of contents, these are handled dynamically by the system.

Things to change:
Logo -delete the logo placement and insert your own. If you need help designing your header page to fit your companies brand just get in touch.
The Main Template holds the bulk of the text and the majority of which can be edited. The curly brackets shouldn’t be edited however they can be deleted or added.
Examples:
Scenario 1
You have downloaded the Fire Detection Main template and need to remove the ROUTINE TESTING paragraph within the PLANNED MAINTENANCE section
{INDEX}.7 PLANNED MAINTENANCE
{INDEX}.7.2 ROUTINE TESTING
{INDEX}.7.3 PREVENTION OF FALSE ALARMS OF FIRE DURING ROUTING TESTING
Select the necessary paragraph including the curly brackets and delete it. You will now need to update the future indexing so:
{INDEX}.7.3 PREVENTION OF FALSE ALARMS OF FIRE DURING ROUTINE TESTING
Should be updated to
{INDEX}.7.2 PREVENTION OF FALSE ALARMS OF FIRE DURING ROUTINE TESTING
Including any subsequent {INDEX}.7.x elements.
If you alter the high level headings e.g. 1.7, 4.2 etc. you will need to update the index page in the Title Cover Sheet. Lower level headings that are changed do not affect the index.
Scenario 2
You would like to add a new section heading at the end of the document to reflect a new government regulation. You download the Fire Detection Main template again and want to add a section after the RESIDUAL HAZARDS section.
{INDEX}.11 RESIDUAL HAZARDS
You can add a section/s directly after:
{INDEX}.12 FIRE & ASBESTOS
You can also add a nested entry:
{INDEX}.12.1 CONTROL OF SUBSTANCES HAZARDOUS TO HEALTH (COSHH)
If you alter the high level headings e.g. 1.7, 4.2 etc. you will need to update the index page in the Title Cover Sheet. Lower level headings that are changed do not affect the index.
Should you encounter trouble with an updated template you can always revert to the original. Please contact us for details
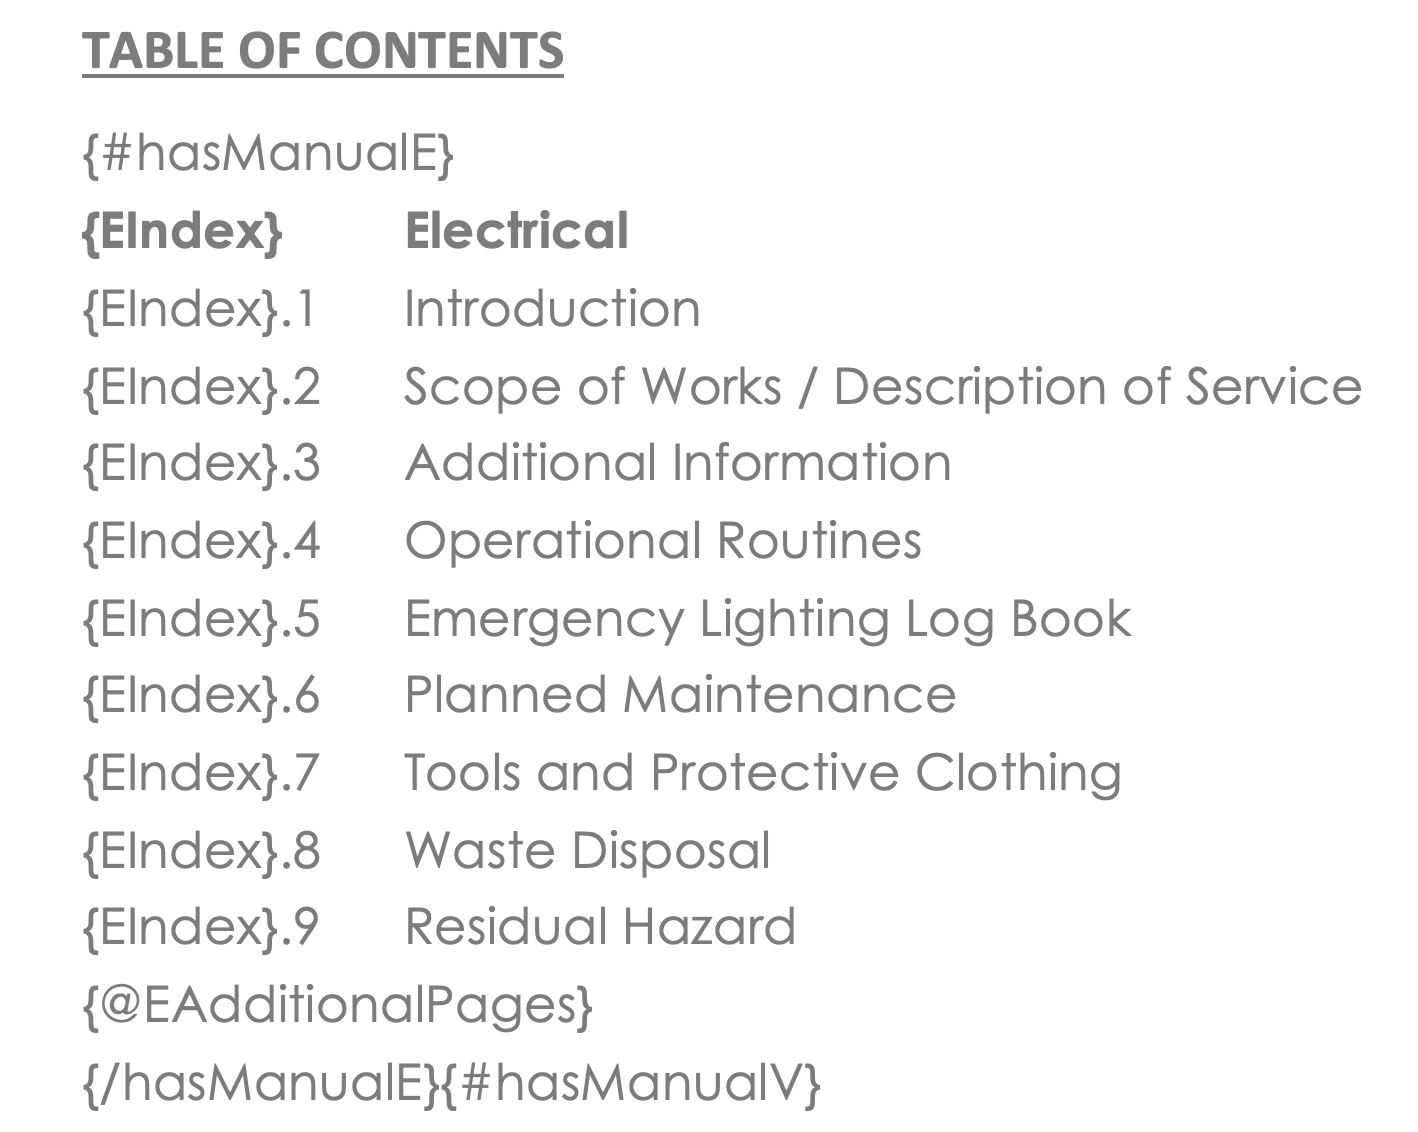
The index is found on the header page and although displays all of our available templates it will only show the sections that relate to your project.
If you have removed sections in your main document you’ll need to edit the header file index values.
For example if you removed the Emergency Procedures section in the main electrical file your original index page would look like this:

You would remove the {Index}.4 Emergency Procedures line and then update the numbering on the remaining lines that follow.
This page is used to display the headings of your main attachments and stock part attachment types. Please update with your logo taking care not to delete the codes in curly brackets.

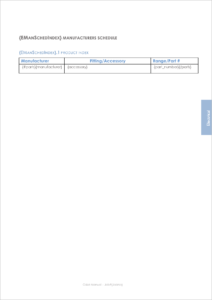
The Manufacturers Schedule is where the system shows all of the products used on a particular job.
As with the other templates this file can be downloaded and edited. This is only a one page document as it only holds the table for the stock parts. The style of the table can be amended but it is imperative that the coded elements remain as they are.