Scope of Works
In order to create the Scope of Works for the project, Dokkit can extract information from Projects Descriptions, Cost Centre Descriptions and from Pre Build names. You can place information in one or all of these places if you are only using one type of O&M manual e.g. Roofing. If your company provides a diverse set of solutions you will need to use the name of the template in a cost centre description in order for the system to distinguish between them when creating the manuals.
Project Descriptions
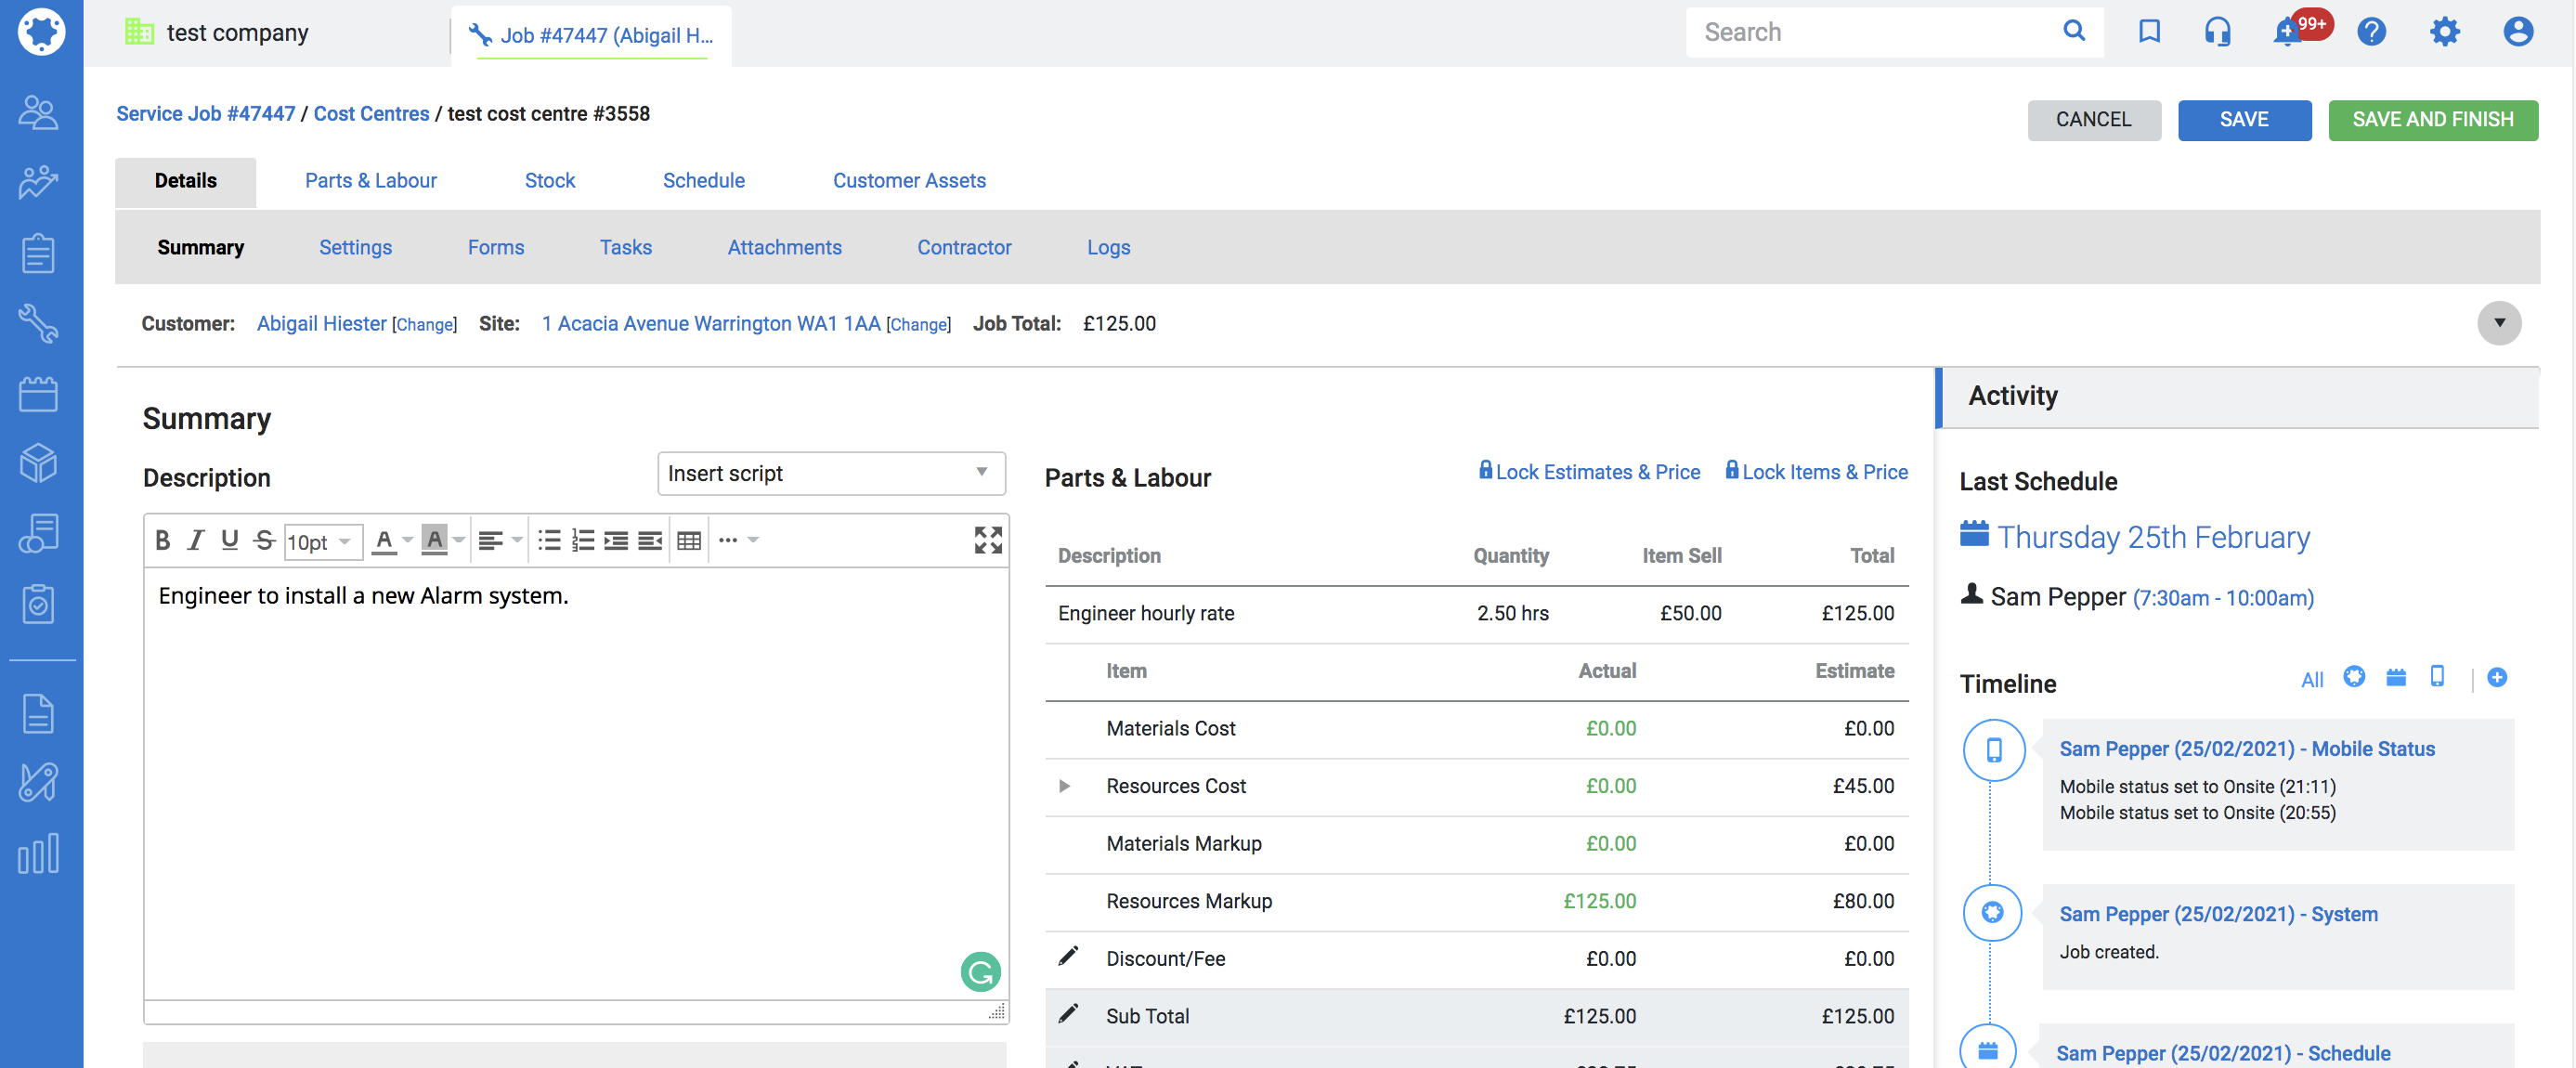
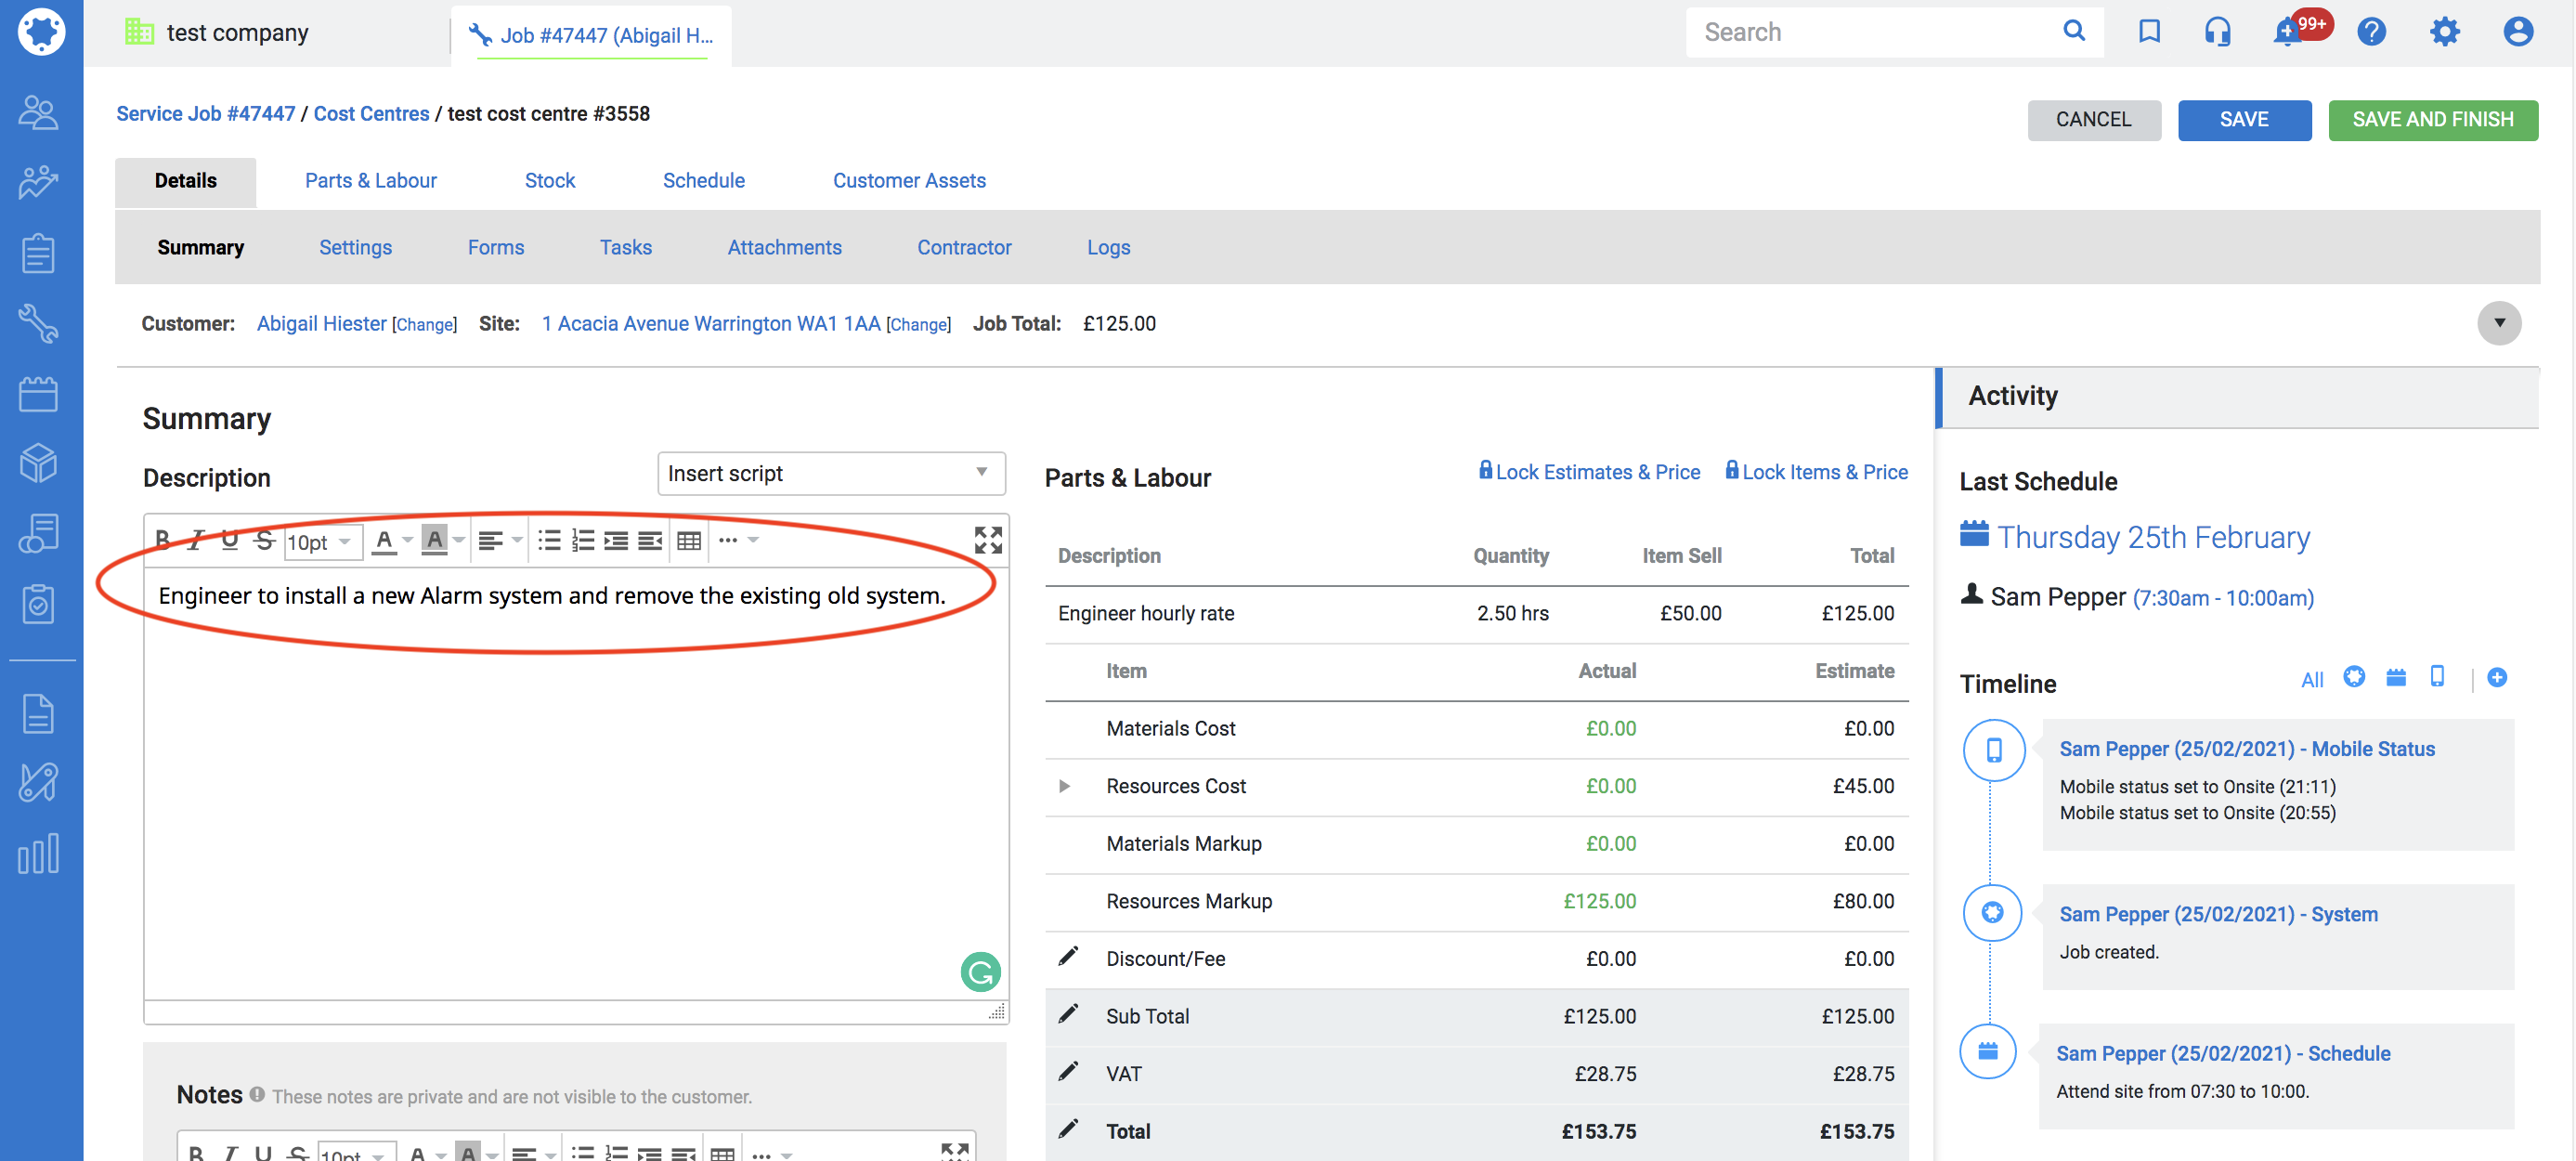
Enter your scope of works information directly into the Project Info tab description field.
Cost Centre Descriptions
Enter your scope of works information directly into the description portion of the Cost Centre’s info tab.
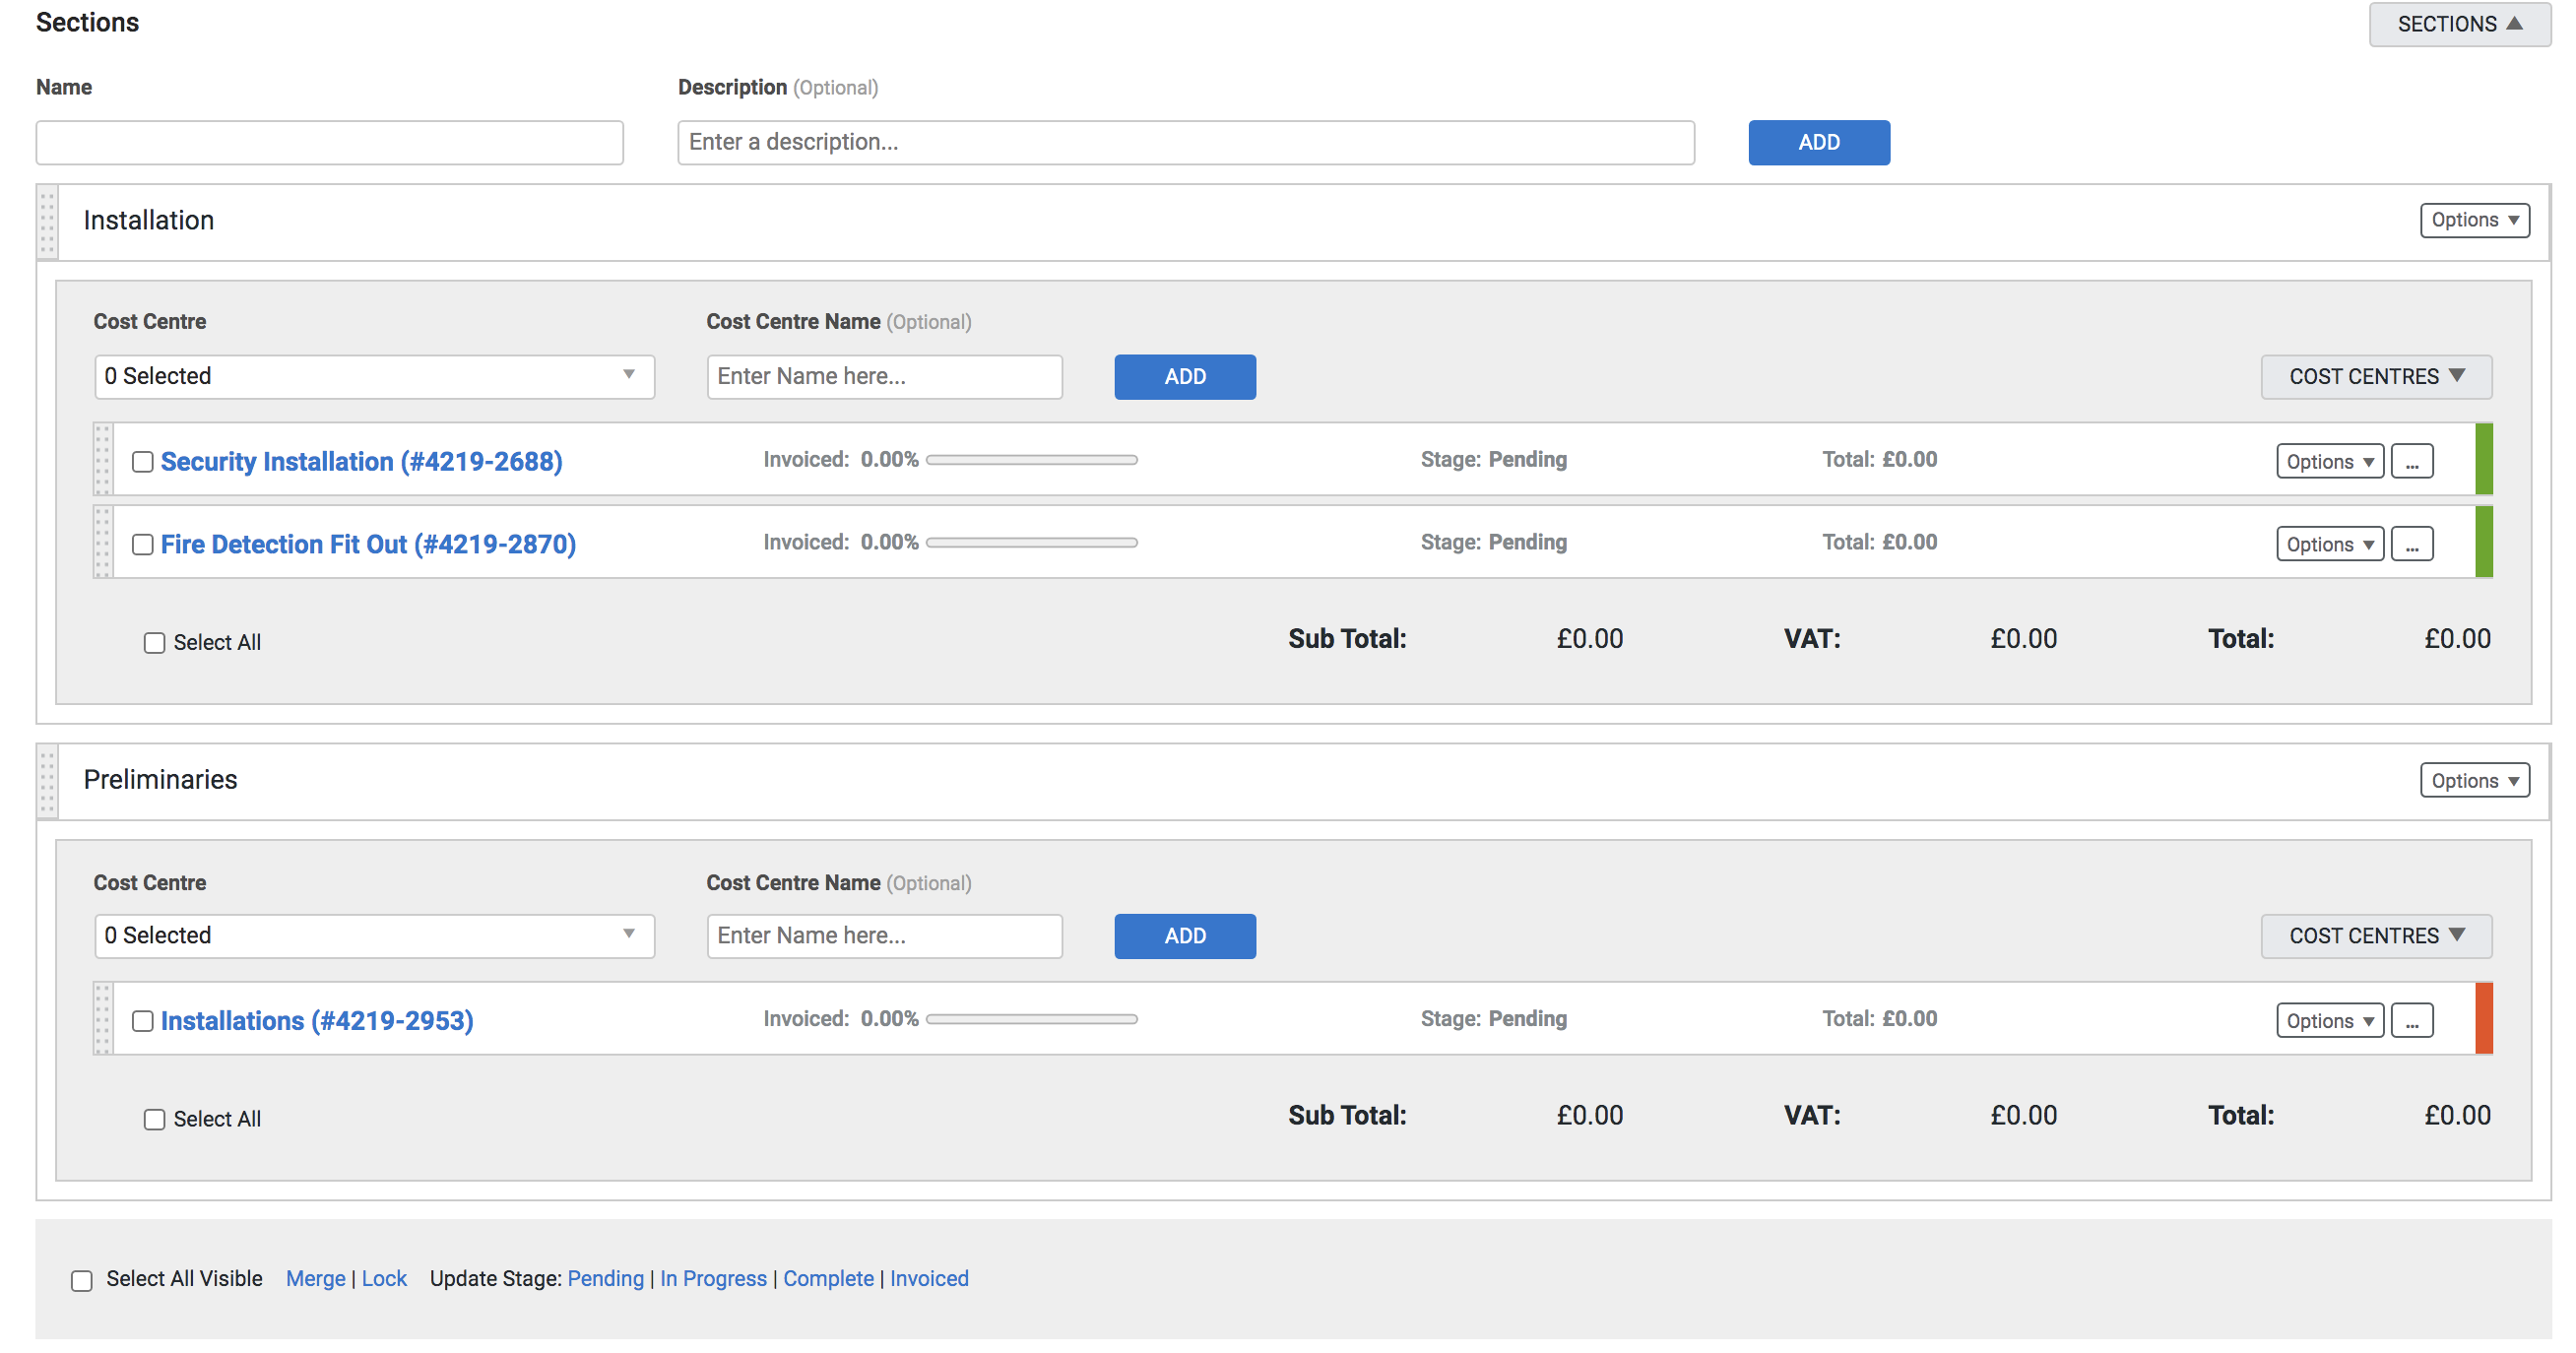
Cost Centre Names for multiple templates
If you are using the templates Flooring and Electrical you can ensure that all of the information will get to the right place if you have the name of the template in the cost centre name as shown below.
Attachments
Catalog items with more than one attachment
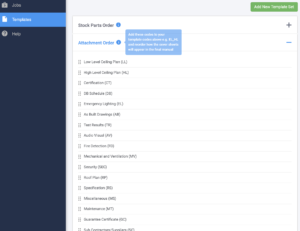
In order to allow more freedom with the type of datasheets you hold (user manuals, quick guides etc.) you can attach codes to the attachment filename so that they can appear with a particular cover sheet (User Guides, Datasheets, Quick Reference Guides etc.). The full list is available in the Templates area of the app where you can also reorder how they groups will appear in the final manual.
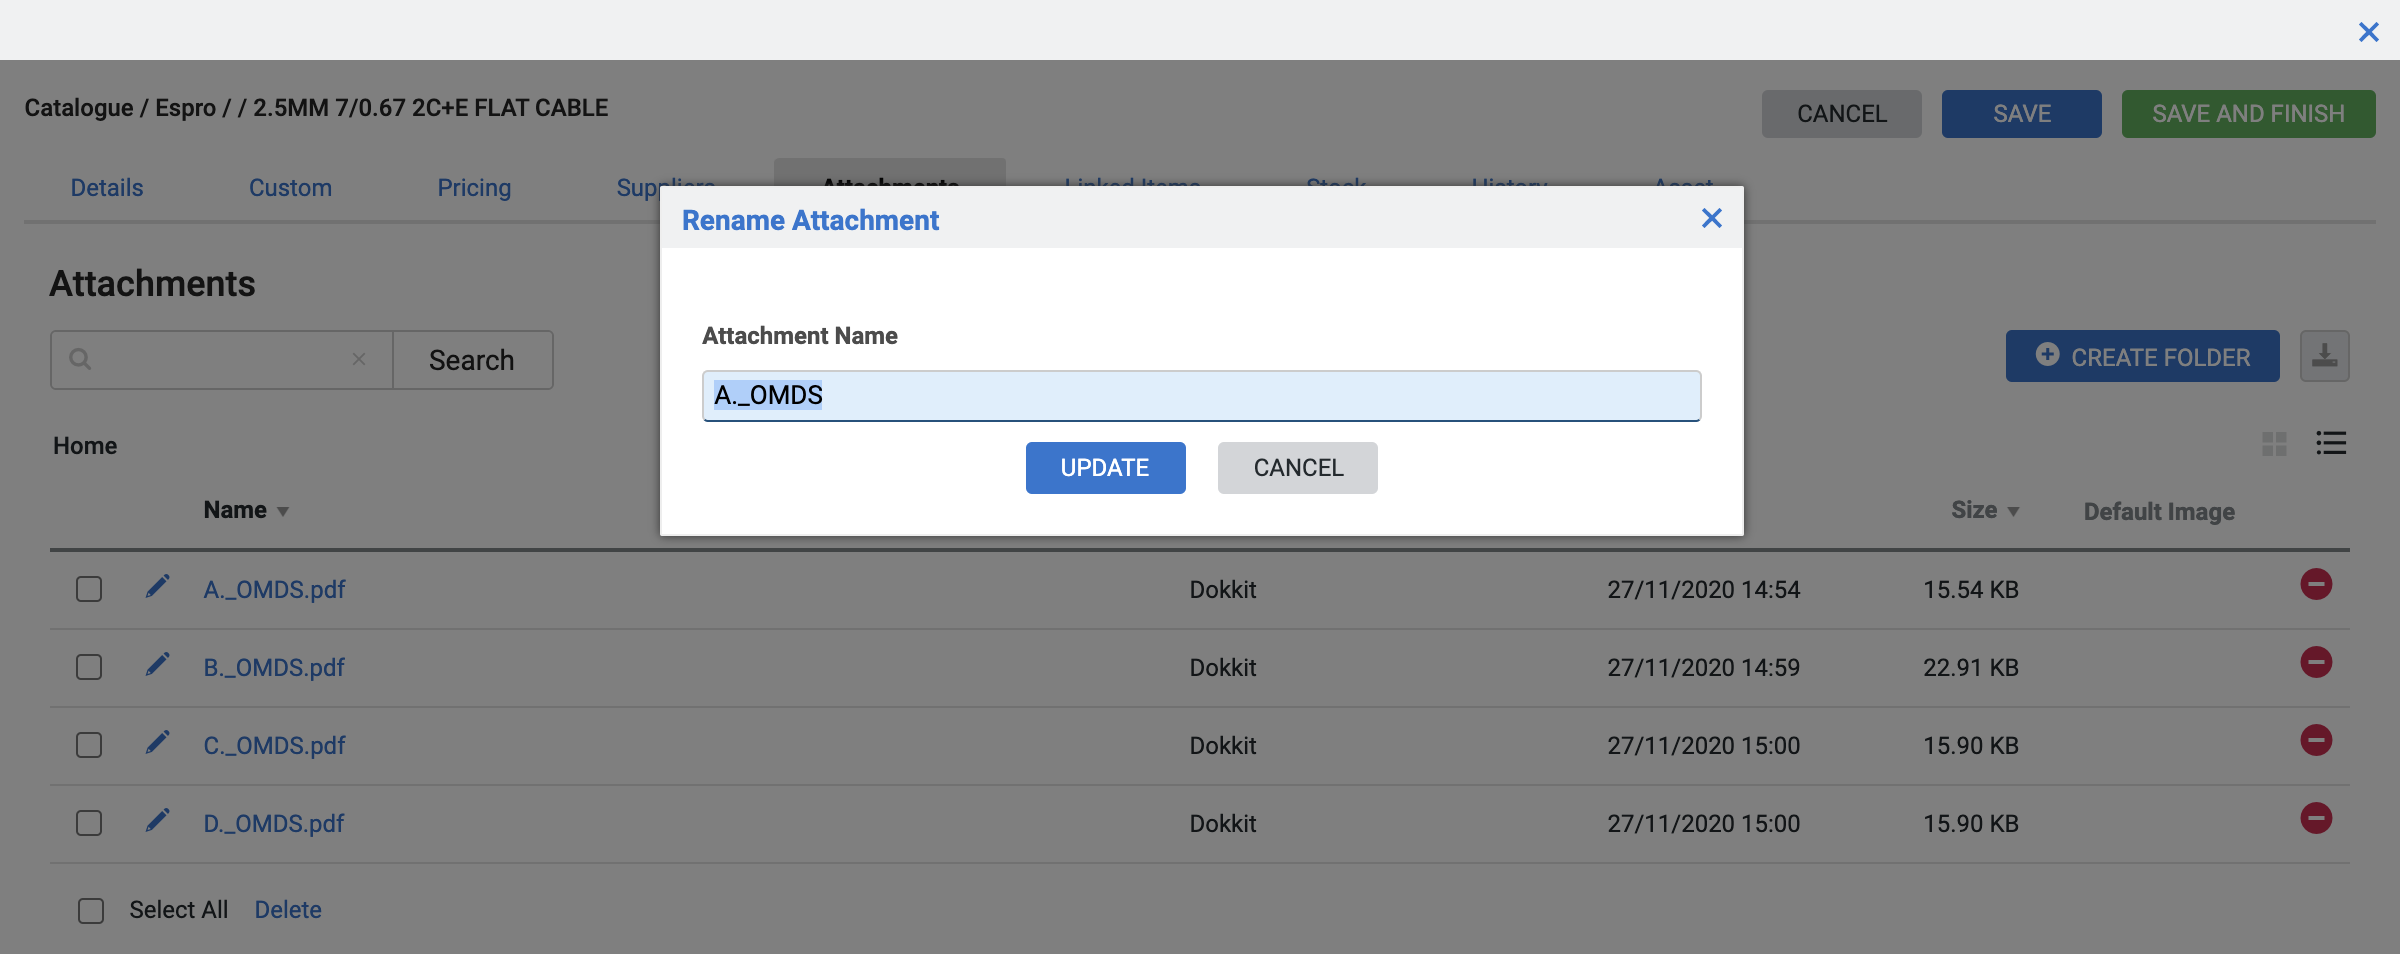
So CR024.pdf would become CR024_OMDS.pdf. To edit the name select the pencil icon next to the attachment in simPRO and make the change directly.

Files without codes will be displayed directly after the manufacturers schedule in the final manual.
You can select or deselect any stock part attachments imported in the job detail page.

There are many filename convertors on the market. Dokkit suggests but does not endorse Advanced Renamer to speed up the process on multiple files.
You can add attachments to stock parts at any time and re-import the job back into Dokkit.
Adobe does not allow for encrypted pdfs (ie., ones with a password) to be merged without removing the password security first. This is an industry standard.
Password protected files
You may unwittingly have pdfs that are password protected. These are most commonly ones that come from a product manufacturer or a customer invoice. If you know the password of the file you can easily remove the security on the file which will allow it to be merged into a final document. However if the file is not your original file and is password protected you may have to request a file that doesn’t have password protection.
Whichever method you use make sure that the file you have in simPRO is now unlocked and then re-import the job into Dokkit.

The title cover sheet contains some dynamic information such as the Client Name, Site Address and the Project Collection Date and some static information such as your logo, web address and registration number. As long as this document contains the necessary curly brackets codes the system will be able to process the information coming from simPRO.
Contact us if you need help designing something. Be careful not to update or delete the entries in the table of contents/Index, these are handled dynamically by the system.

Things to change:
Logo -delete the logo placement and insert your own
Website – update the web address www.ACMEcommercial.co.uk with your web address and your company address if needed
Registration – Update the registration number with your Companies House number or remove
Contacts Page – Update your company info with your full address. The elements in curly brackets will be auto updated each time
The Main Template holds the bulk of the text and the majority of which can be edited. The curly brackets shouldn’t be edited however they can be deleted or added. See tab Index. Please search through the document for ACME and change that to your company name or delete as appropriate.
Examples:
Scenario 1
You have downloaded the Fire Detection Main template and need to remove the ROUTINE TESTING paragraph within the PLANNED MAINTENANCE section
{INDEX}.7 PLANNED MAINTENANCE
{INDEX}.7.2 ROUTINE TESTING
{INDEX}.7.3 PREVENTION OF FALSE ALARMS OF FIRE DURING ROUTING TESTING
Select the necessary paragraph including the curly brackets and delete it. You will now need to update the future indexing so:
{INDEX}.7.3 PREVENTION OF FALSE ALARMS OF FIRE DURING ROUTINE TESTING
Should be updated to
{INDEX}.7.2 PREVENTION OF FALSE ALARMS OF FIRE DURING ROUTINE TESTING
Including any subsequent {INDEX}.7.x elements.
If you alter the high level headings e.g. 1.7, 4.2 etc. you will need to update the index page in the Title Cover Sheet. Lower level headings that are changed do not affect the index.
Scenario 2
You would like to add a new section heading at the end of the document to reflect a new government regulation. You download the Fire Detection Main template again and want to add a section after the RESIDUAL HAZARDS section.
{INDEX}.11 RESIDUAL HAZARDS
You can add a section/s directly after:
{INDEX}.12 FIRE & ASBESTOS
You can also add a nested entry:
{INDEX}.12.1 CONTROL OF SUBSTANCES HAZARDOUS TO HEALTH (COSHH)
If you alter the high level headings e.g. 1.7, 4.2 etc. you will need to update the index page in the Title Cover Sheet. Lower level headings that are changed do not affect the index. See the Index tab.
Should you encounter trouble with an updated template you can always revert to the original. Please contact us for details.
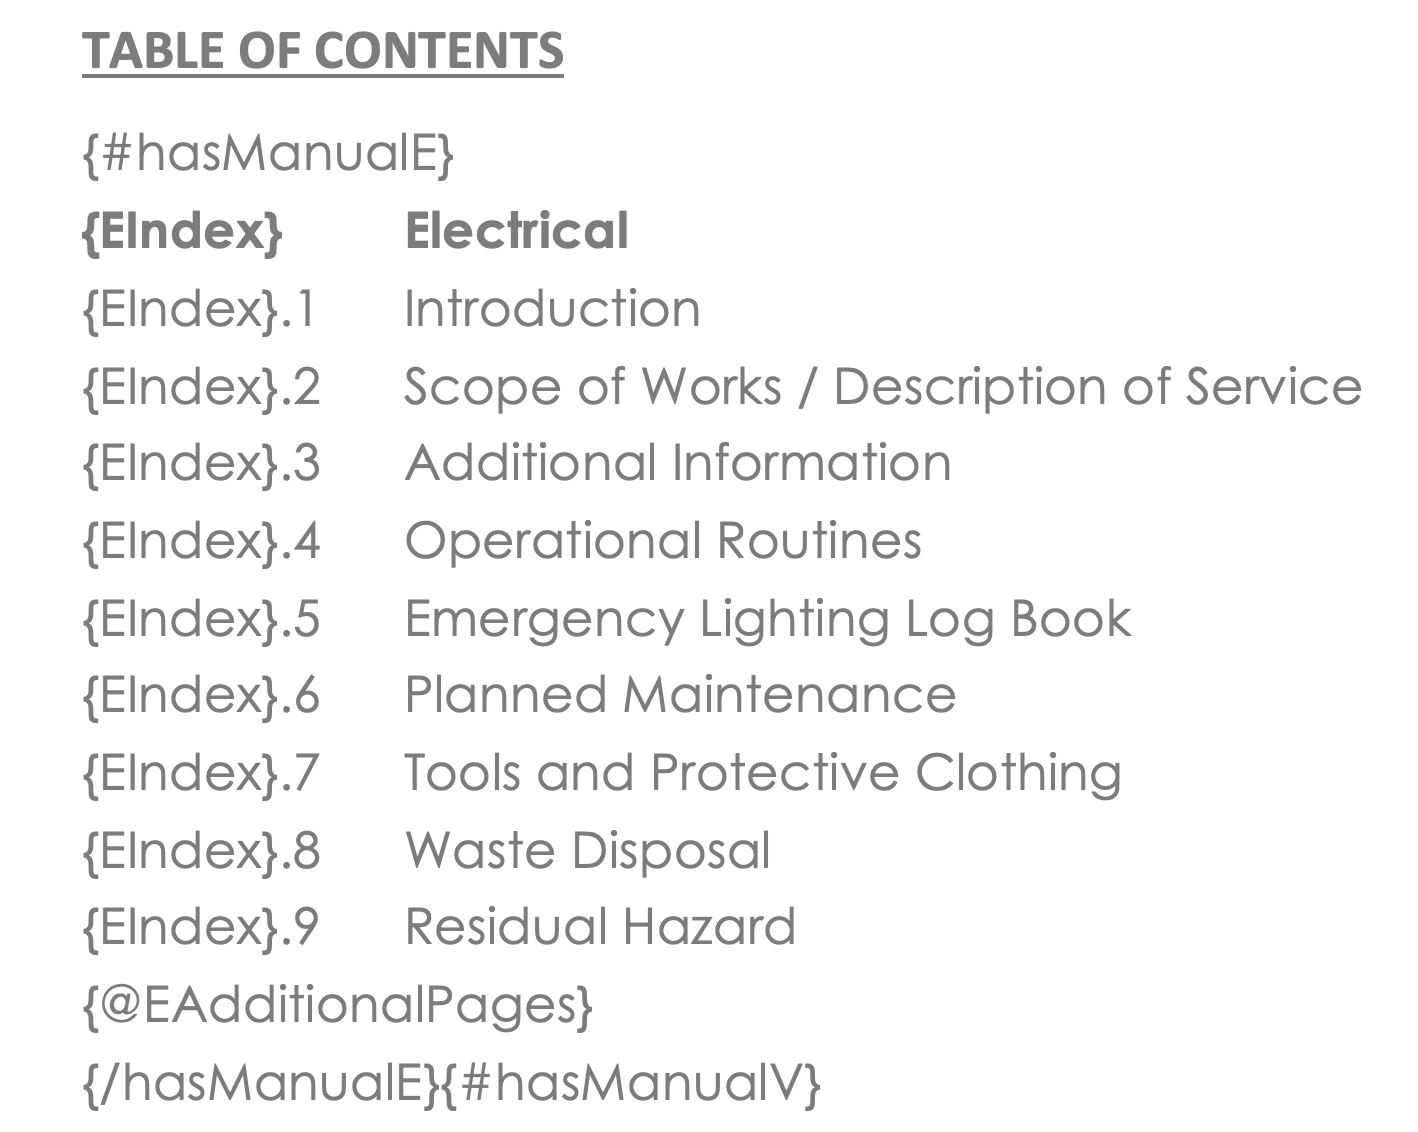
The index is found on the header page and although displays all of our available templates it will only show the sections that relate to your project.
If you have removed sections in your main document you’ll need to edit the header file index values.
For example if you removed the Emergency Procedures section in the main electrical file your original index page would look like this:

You would remove the {Index}.4 Emergency Procedures line and then update the numbering on the remaining lines that follow.
This page is used to display the headings of your main attachments and stock part attachment types. Please update with your logo taking care not to delete the codes in curly brackets.

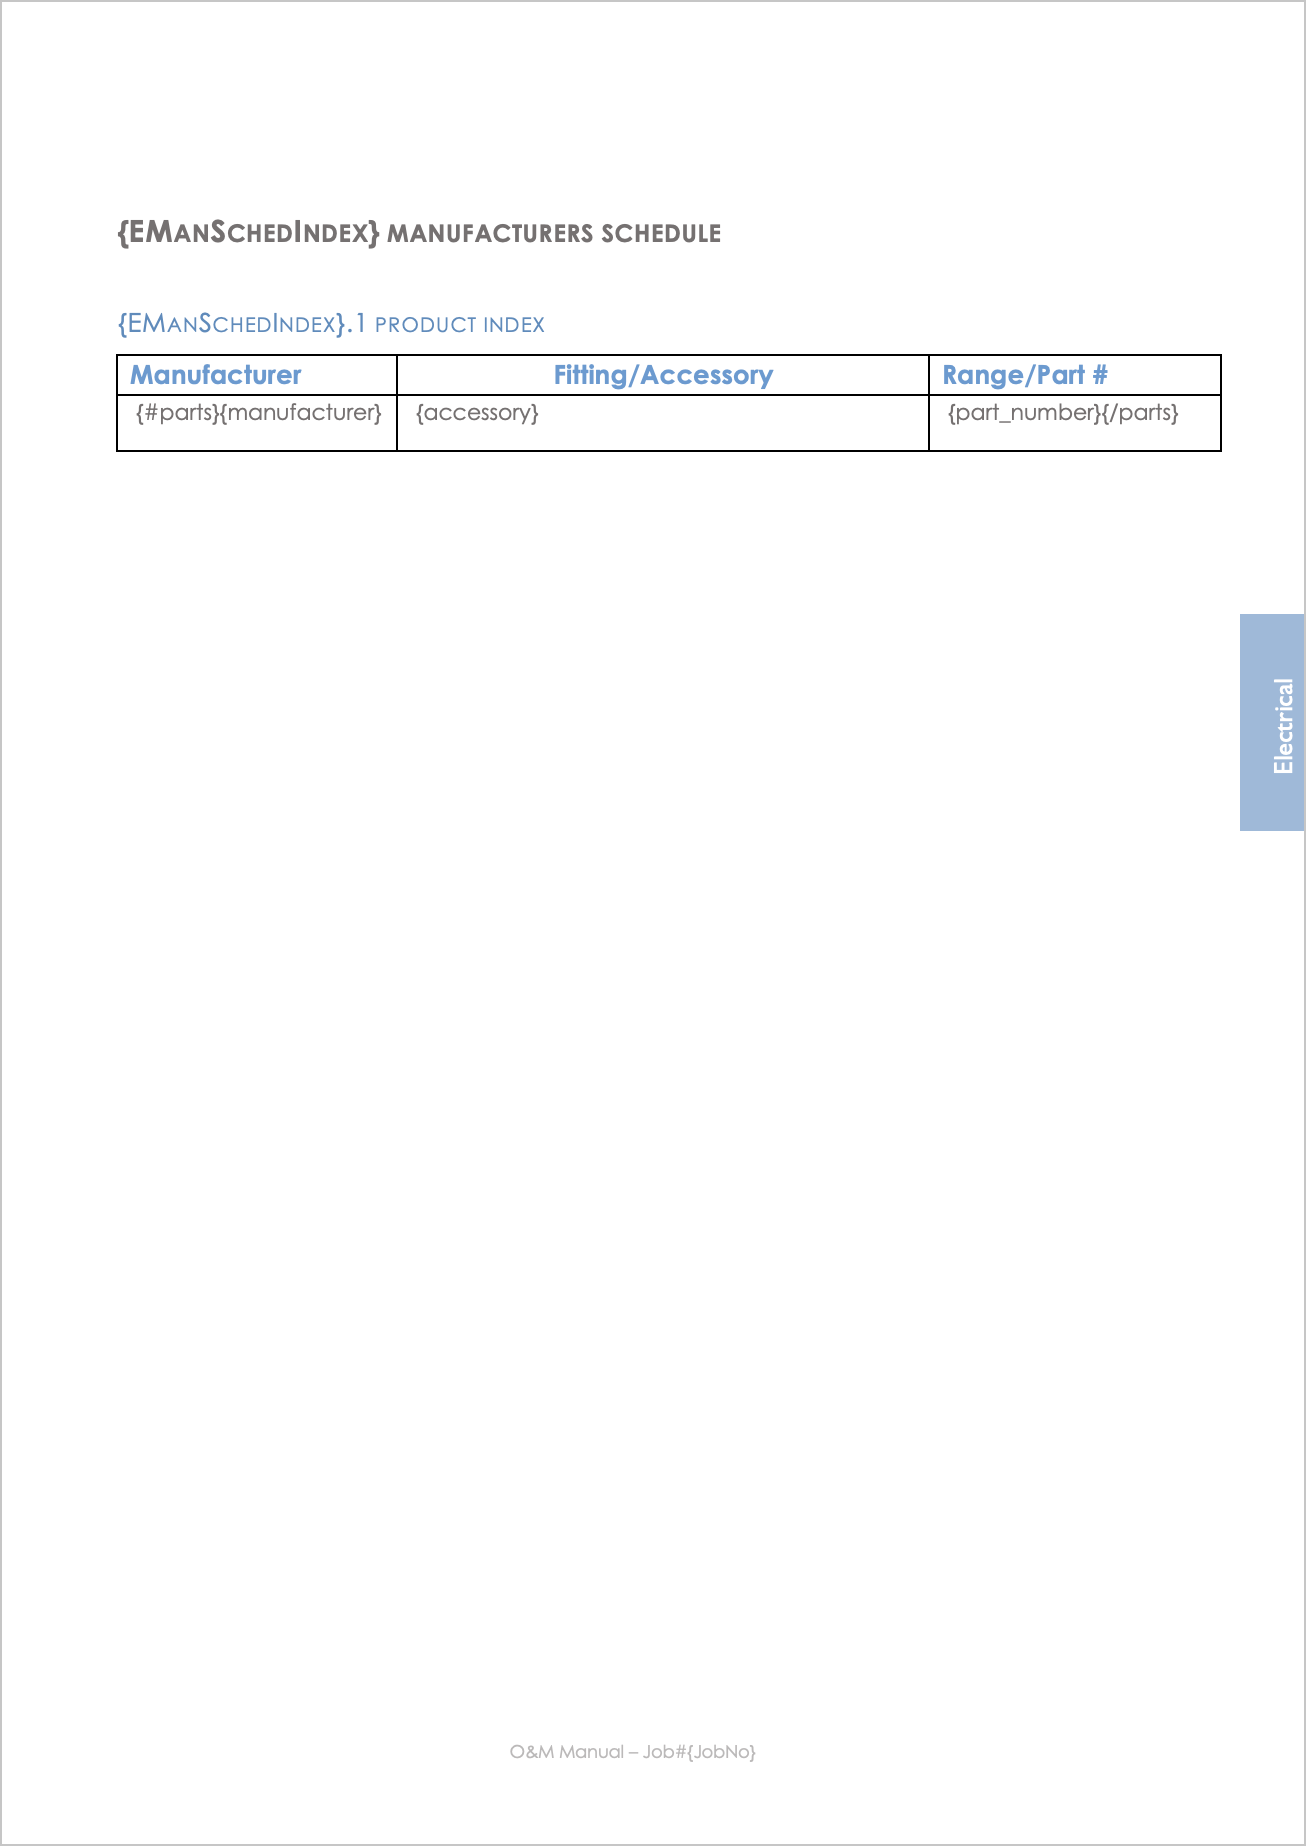
The Manufacturers Schedule is where the system shows all of the products used on a particular job.
As with the other templates this file can be downloaded and edited. This is only a one page document as it only holds the table for the stock parts. The style of the table can be amended but it is imperative that the coded elements remain as they are.